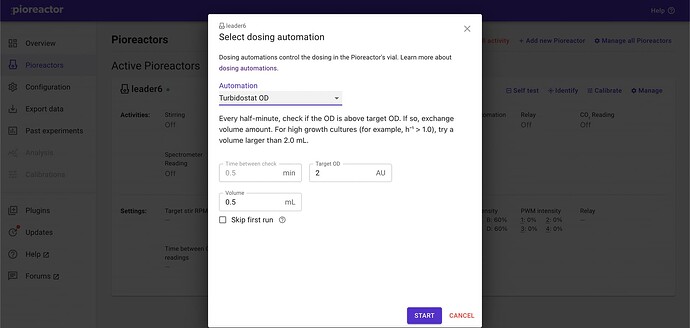
There was an automation for this, and I thought we released it as a plugin, but looks like we didn’t…
Anyways, it’s more involved. I’ll preface it by saying if more people ask about this, we can easily ship it with the default software. For now, here are the steps.
-
We need to create a new dosing automation that uses ODs instead of nODs. This new dosing automation is defined in a Python file. We can use the existing turbidostat.py as inspiration - we are just changing its target. In the following gist, I’ve just replaced all instances of
"normalized_od"with just"od": turbidostat.py · GitHub. Note:- the important part is line 37. The variable
self.target_odis what you’ll choose in the UI, andself.latest_odis populated with incoming OD signals (which are calibrated, as you’ve done the calibration and hopefully changed your config.ini[od_config][use_calibration]too). - Note the new name of the automation:
turbidostat_od- we’ll use this later.
- the important part is line 37. The variable
-
Add this file to your pioreactor in the directory
/home/pioreactor/.pioreactor/plugins. You can use this:nano /home/pioreactor/.pioreactor/plugins/turbidostat_od.pyand copy & paste the code and exit. -
Okay, you’ve just created a new automation! We can test this with
pio run dosing_control --automation-name turbidostat_od. This should fail with aTypeError- that’s fine, we don’t want to run it anyways. -
Next is to add it to the UI. The automations in the UI are populated from flat files. Here’s the original for the default turbidostat. We can copy this, too. Here’s a gist of the orignal with some variable names replaced to match what we did in Python. Save this file by running
nano /home/pioreactor/.pioreactor/plugins/ui/contrib/automations/dosing/turbidostat_od.yamland copy and paste. -
That should be it! Go back to your UI, do a hard-refresh (shift-r) (or just wait a moment and refresh), and your new automation should be in the dropdown. Happy to help more or explain a step in more detail!
